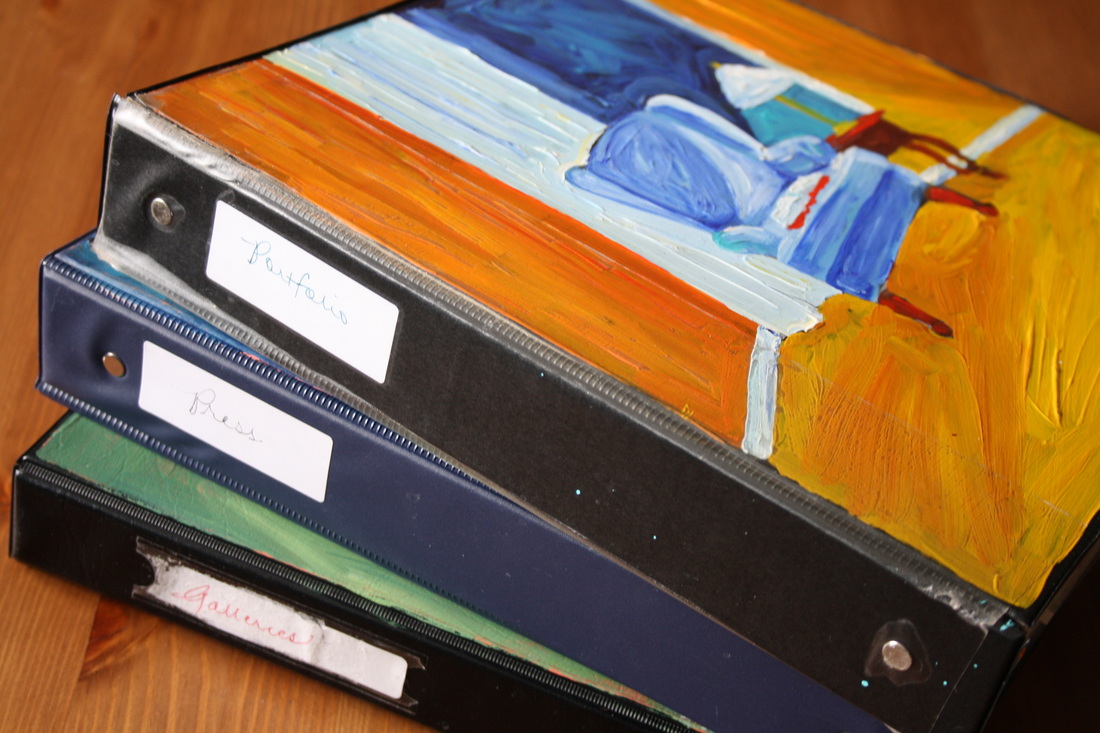
Fortunately I began keeping track of my artwork very early on...unfortunately I didn't always do it well. But, I do have most of my work recorded. There are a variety of artists' tracking software on the market but I still enjoy paging through books so I use binders. Initially I used a single binder and dividers, which I eventually painted as a plain black binder was very unattractive and I wanted something nice to view. Over time it spilled into a second and then a third binder which I separate for portfolio, press, and galleries/contracts.
When I began painting professionally there was no such thing as a personal computer so I tracked everything by hand on graph paper and took photographs which I then had developed (no digital cameras either) to add to my portfolio. Now I track each painting title, medium, size, date of completion and purchaser/seller/donation on an MS Excel spreadsheet which I occasionally print to add to the binder. Again, this was initially one page and now there are separate pages for each body of work. Inside each binder are plastic sleeves that hold all the printouts which means that the sheets don't tear and everything stays nice and neat. This works particularly well with the newspaper articles and exhibit invitations. In my portfolio binder I also keep an updated copy of my Artist Statements and Curriculum Vitae (basically my artist's resume which includes Education, Professional Experience, Exhibits, Bibliography - articles + television, and Affiliations). Often I think I'll remember everything even if I don't write it down, but believe me, I don't. I used to keep the rejection letters, but I don't anymore, unless they're exceedingly kind. Not only is it good to trace what you have accomplished and where pieces have traveled but it is also nice to see how far you have come as an artist as you compare early work and remember how you felt about it then to the growth you experience as an artist in the latest body of work. 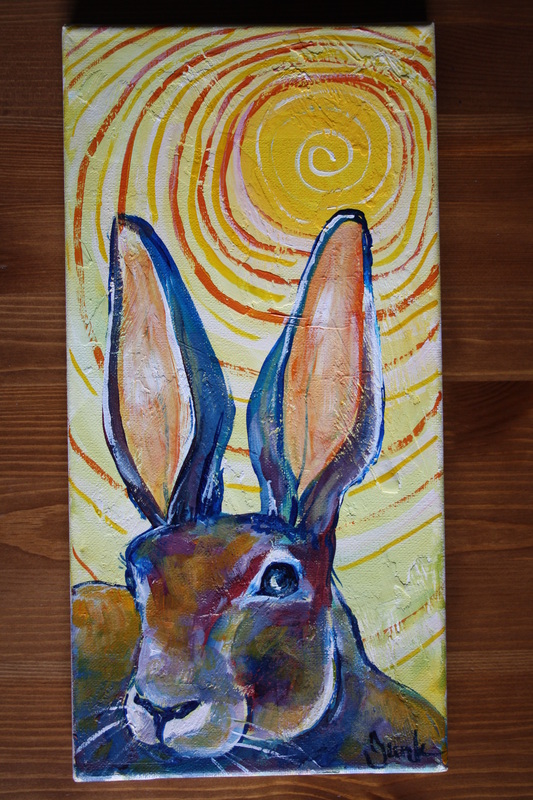 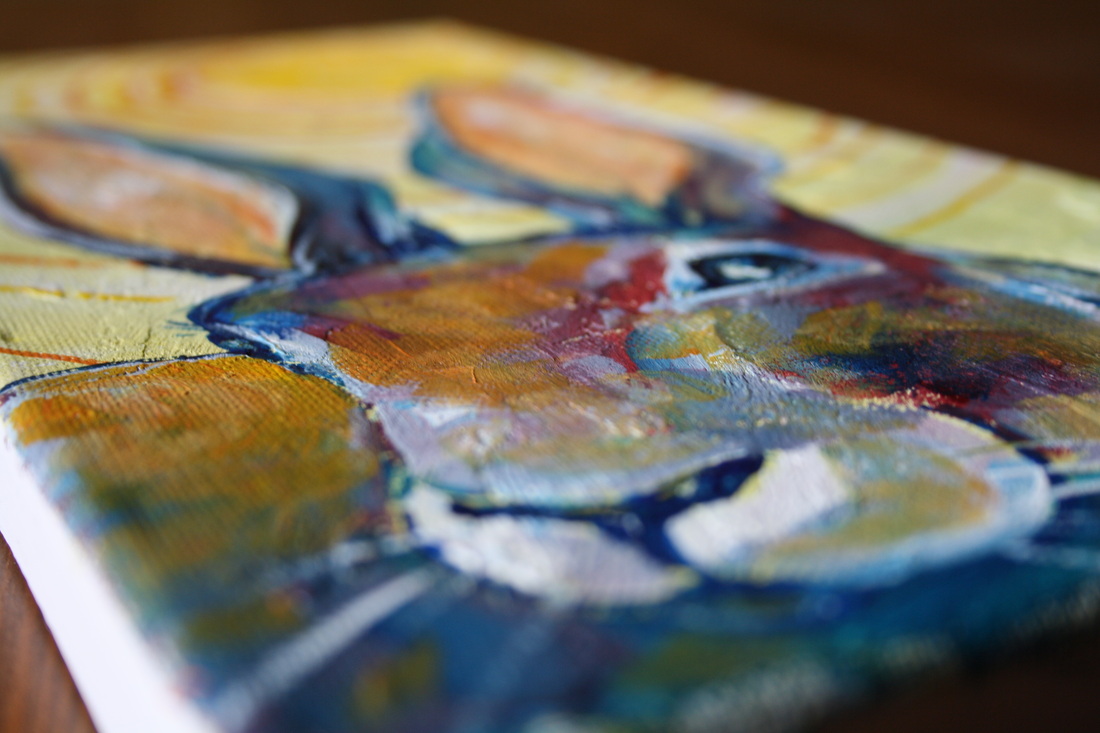 A few weeks ago I just knew a jack rabbit would show up in the 52 WEEKS PROJECT as they've been showing up for me in many ways...as footprints outside my studio window, running like the wind and then stopping to watch me as I walk along the local pathways, while traveling east with my SouLodge sisters, in the novel I'm currently reading, The Final Confession of Mabel Stark (a fascinating fictional story about an actual tiger trainer in the 1920's) and in a book given to me by a patron recently, When God Was a Rabbit (can't wait to read it).
I was also asked if I was born in the Year of the Rabbit in the Chinese zodiac (I wasn't...it was the Year of the Horse). What I find most interesting about rabbit is that she symbolizes creative energy, commitment, and new beginnings. Rabbit is sensitive and quick-thinking, teaching us to be alert and attentive. They are associated with joy and luck, reminding us to let go of fears and to lighten up. A perfect harbinger of spring. 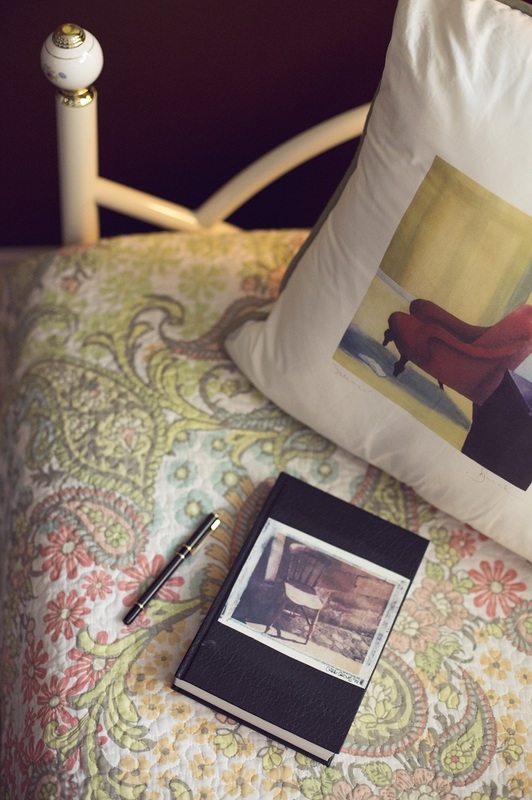 Awhile ago I read an article on how to be creative. I wrote down a few points that I tend to follow myself:
1. Limit your tools - do this by first focusing on one form of media and even substrate...not to say that you shouldn't experiment but it is such a good practice to create a body of work. At different times I even utilized only one size of canvas while limiting my palette to primary colours + white. It's a great way to stretch those creative muscles. 2. Don't listen to others - keep your work close to your heart for awhile...feedback is nice but not until you're confidant in what you do. One of the hardest things to do is to listen to that still, small voice inside that really knows what you should do...pay attention to what draws your attention. 3. Create a routine - and if possible, a space that you can leave your work-in-progress and materials without having to put them away. There are days I don't feel like painting but I will pop into my studio and look for awhile...which leads to just doing one thing...which leads to a couple of hours of happy work without even realizing. When I worked full time I got up at 6:00 am every day to paint for an hour before getting ready to head out the door. I still do that most days but fortunately I now get to paint for several hours each day. 4. Don't worry about perfection - this is a tough one. Sometimes we tend to compare ourselves to others, which is not a good thing. We each have our own skills, talents, experiences and genetic make-up so of course we will be different. And that's a beautiful thing. 5. Ignore trends - trends are created by doing something new and different. And in this ever-changing fast-paced world they come and go very quickly. It's good to focus on what you love, what catches your own eye and heart...and create your own trends. 6. Let go of the past - this can be a tough one...I know. I painted chairs for many, many years and then took a sabatical, which included not painting in acrylics at all. I experimented with different media and subject matter and after a couple of years came back to the chairs because it was comfortable. It was okay, but I had lost my passion for it, so I'm glad that I finally took the leap to allow myself to do whatever it was that interested me. And it's been a very good thing. Now I'm loving what I do all over again. 
I've been working on a painting for a friend and I have to say that it's been an absolute joy. Though today I was out of town all day driving through terrible spring flurries, sleet, snow crystals and rain but I still managed to have a terrific day.
At Bluerock Gallery I viewed Dana Roman's beautiful new exhibit 'Moods of Nature' and met another artist, Barb Fedun, both who are also featured in the book 'Artists in the Raw' by Deborah Catton. I was so glad she recognized me from the book as we ended up having a wonderful conversation. I love this amazing group of female artists in Alberta that I have the privilege of exhibiting with and getting to know. And I love serendipity. You just know when you were meant to meet someone and I have a good feeling that we will meet again. I also picked up more art supplies...always a favorite pastime. In June I have registered for Samantha daSilva's large abstract workshop at the Calgary School of Art and I'm excited to see her process as well as play with new media. I'm really interested in the idea of working with a paint roller, no brushes. Plus it's been so long since I worked with mixed media, particularly modeling paste, and I also picked up some glass bead gel...just for fun. And watching an artist at work is one of my greatest pleasures. So, in spite of the gray weather we've been experiencing, I had a really, really good day. 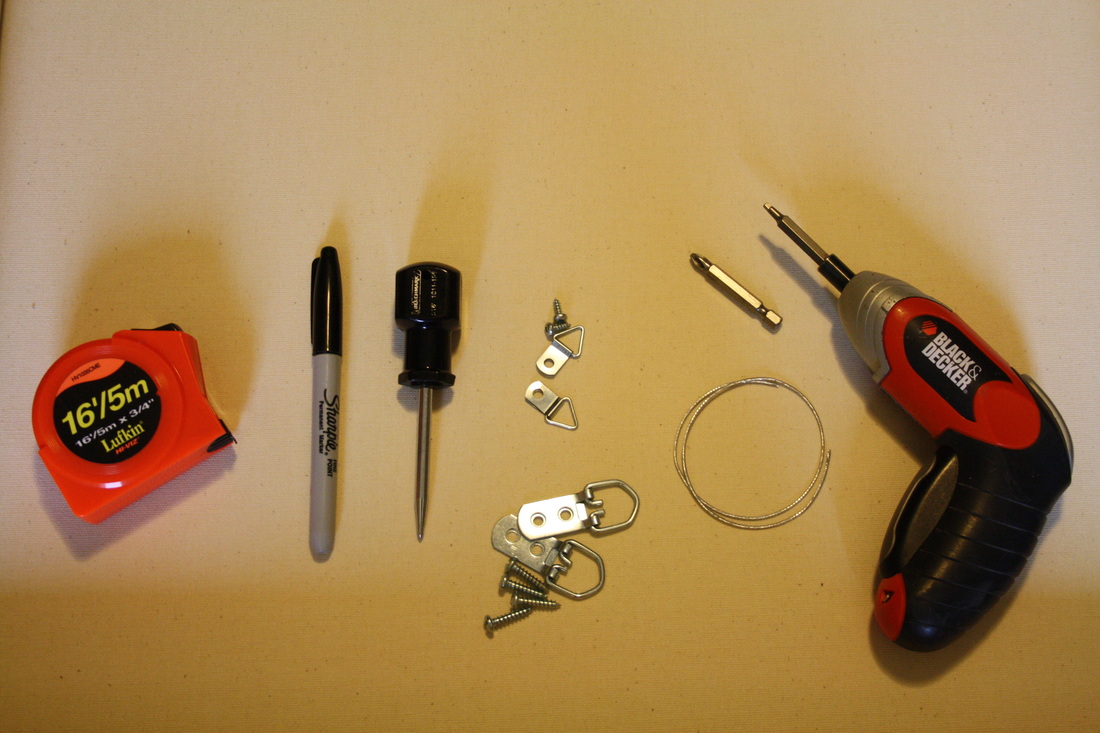 Many years ago I was taught by gallery directors and framers how to wire artwork...these are the rules I still follow today. My tools include a measuring tape, marker, awl, single or double hole D-rings + screws, mid-weight picture hanging wire and cordless screwdriver with two bits - star and square (use depends on the screws that come with the D-rings). Most of these items are available in hardware or craft stores and I have even found some at Walmart.  The first thing I do is measure the height of the piece and divide that number by three as the hardware should be attached 1/3 of the way down the back of the artwork in order to hang properly. Using my marker, I place a small mark at that point. 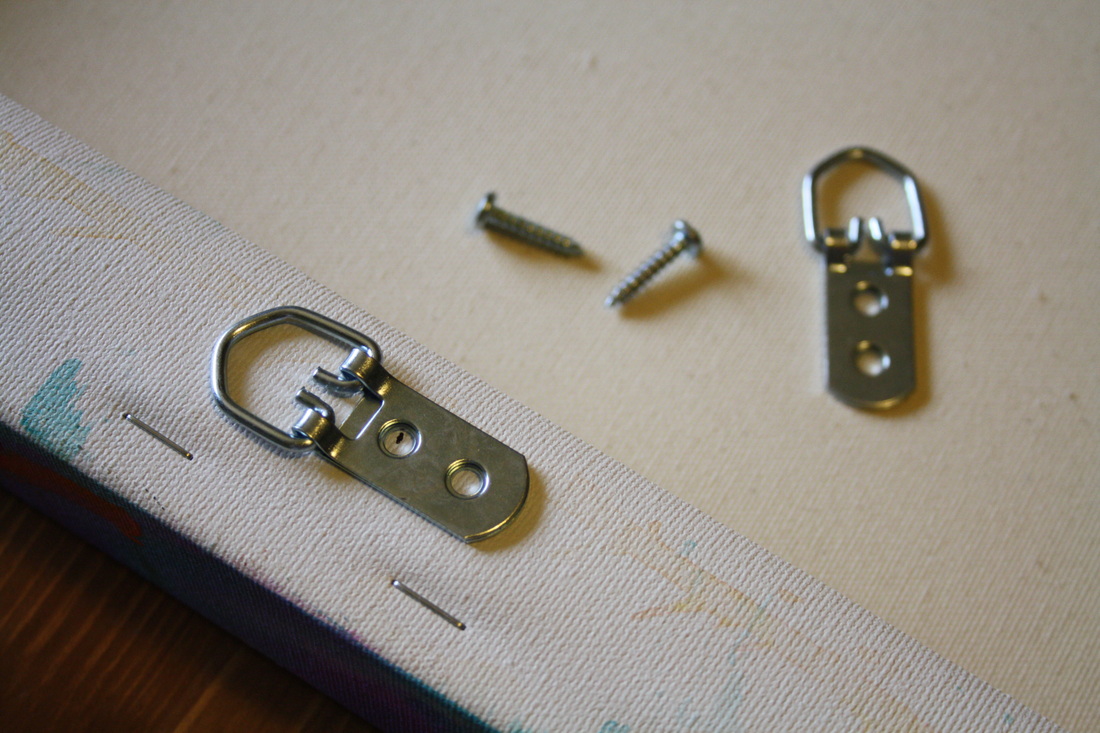 Whenever I attach hardware to larger pieces (ie. 5 feet or larger) I use the double hole D-rings and attach them vertically without using any wire. This way the piece always hangs straight and doesn't tilt every time a door is closed. 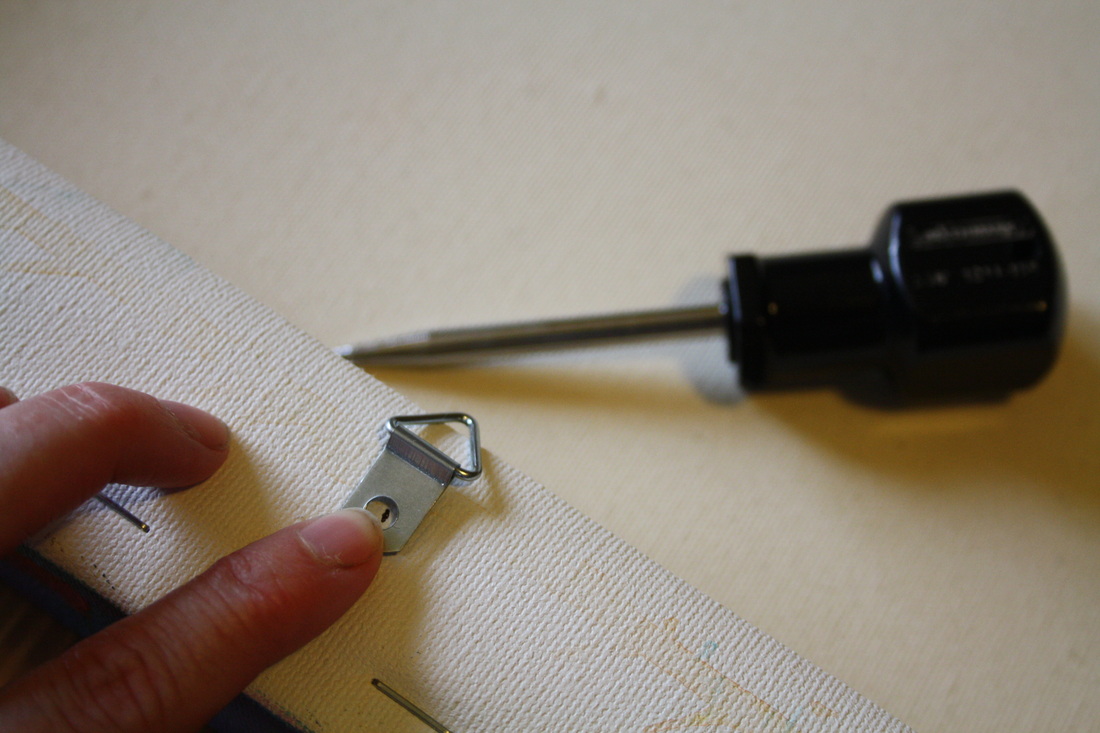 Fortunately, because I work on stretched canvas, the painting doesn't typically weigh too much so I can usually use smaller D-rings. At this point, I hold the ring in place while I use my awl to place an indent onto the wooden stretcher bar through the hole on the D-ring. 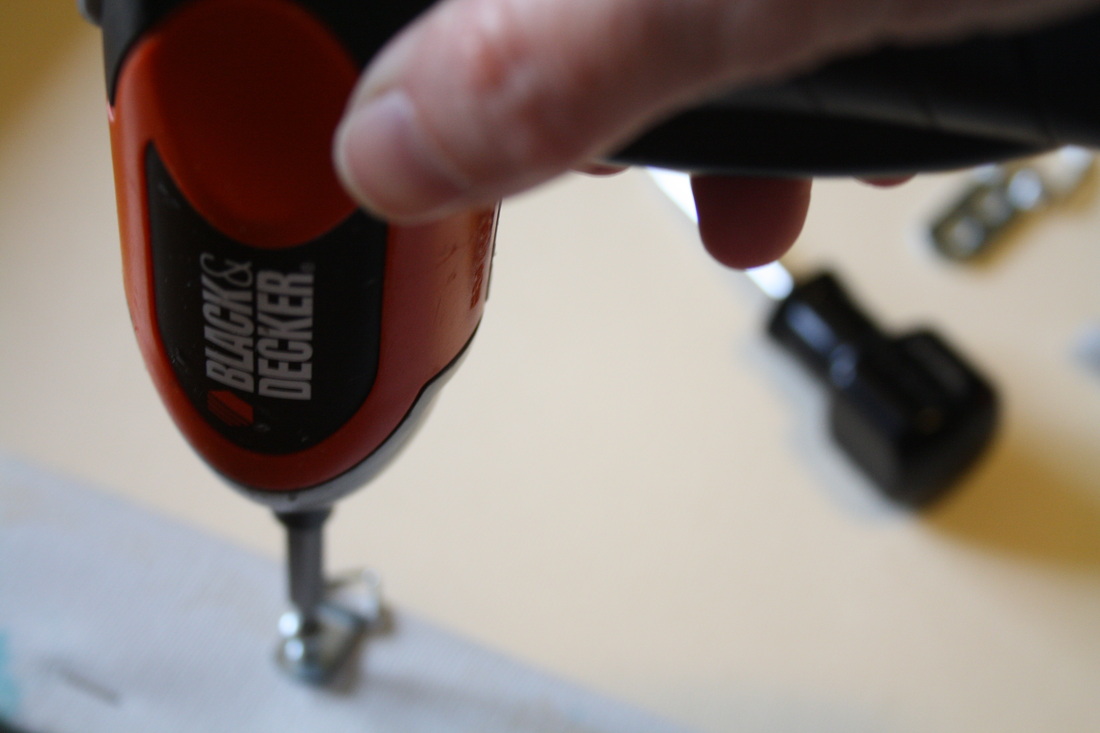 The awl indent makes placing the screw easier as sometimes the kiln dried stretcher bars can be a little tough so I occasionally need both hands to apply pressure to the screw head. 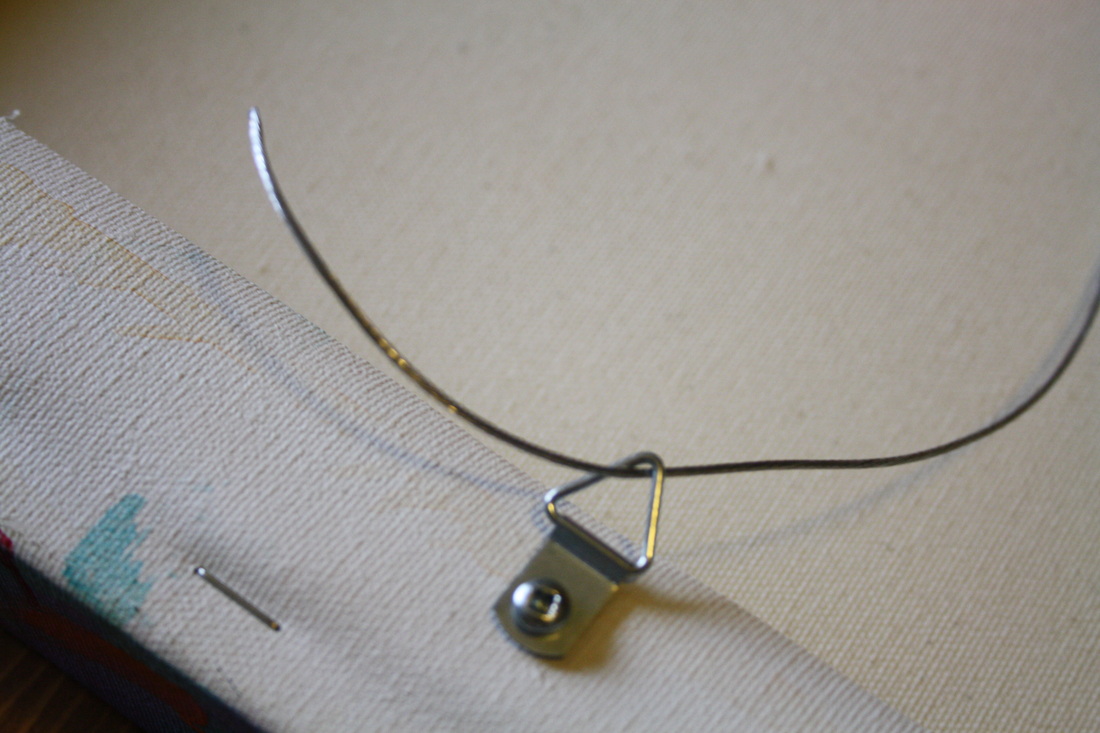 I typically pull the hanging wire up through the bottom (near the canvas) of the D-ring so there is a tail of at least 4-5 inches (depending on the size of canvas). 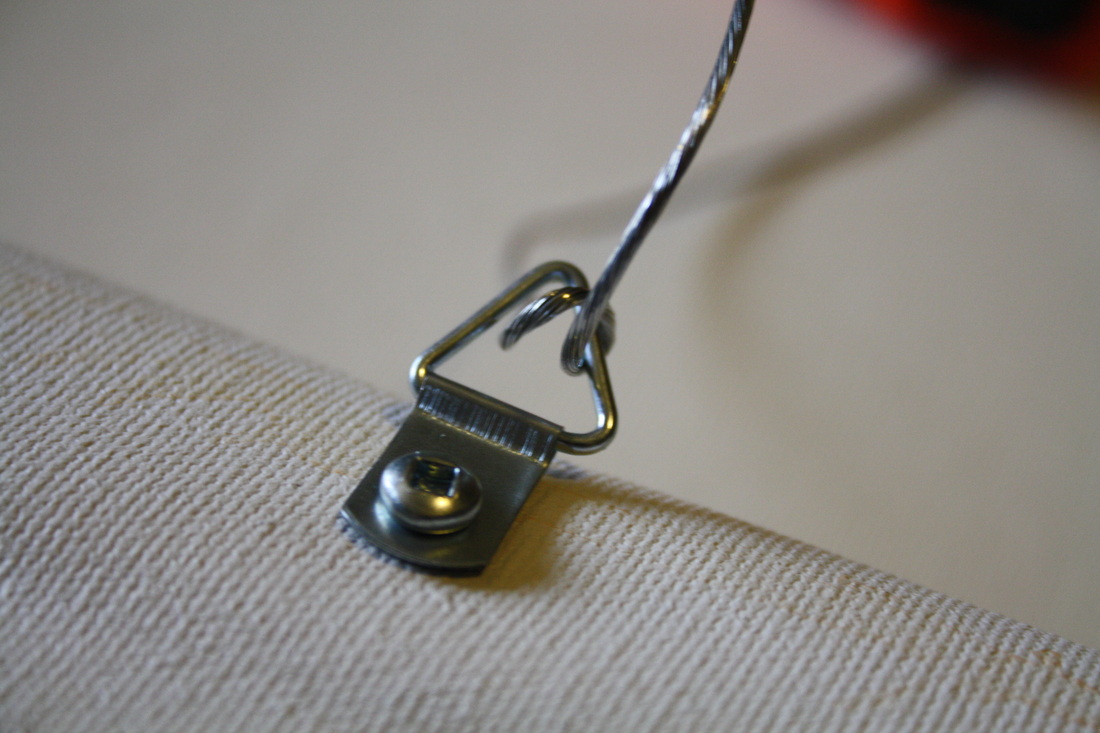 In order to keep the wire from slipping loose, I wrap the wire around and pull it through a second time. I pull the wire fairly taught but leave a little room for give so that the piece is easier to hang onto a hook on the wall. If I'm wiring a number of pieces of the same size, I will hook my measuring tape onto the wire and measure to the top of the painting just to be sure the pieces will be easier to hang when exhibited. 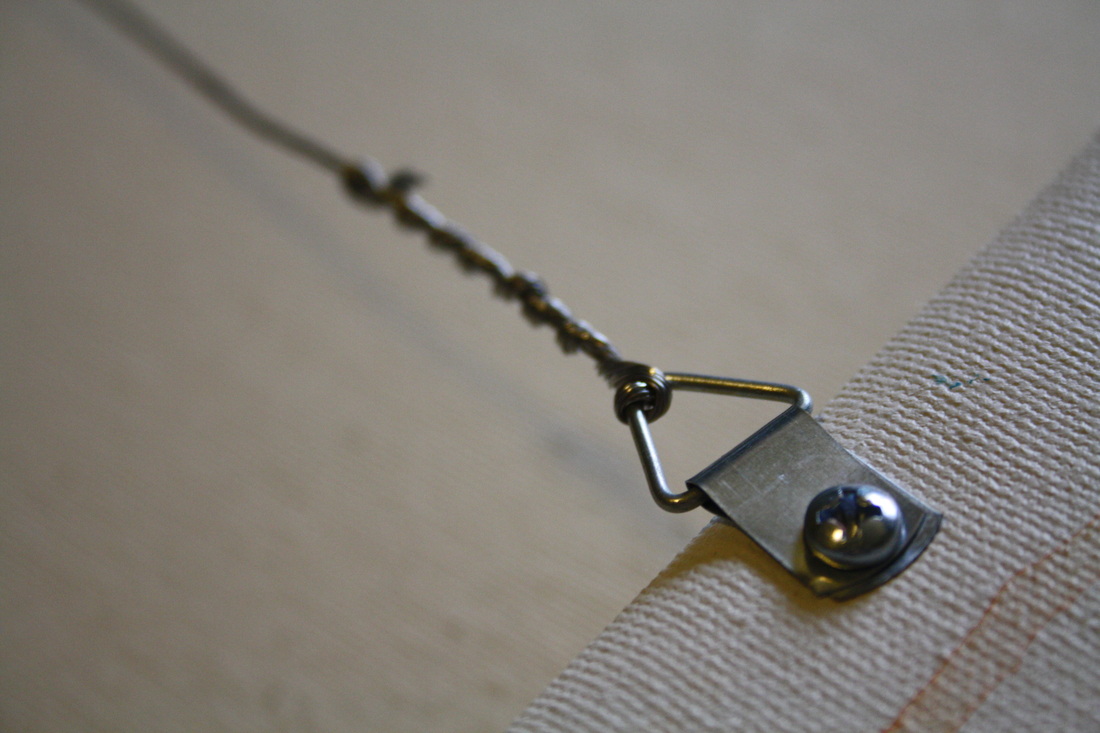 Wrap the wire tightly so that the possibility of stretching is minimized. Some people wrap tape around the wire and though I don't I do sometimes use a crimper to tighten the wire. 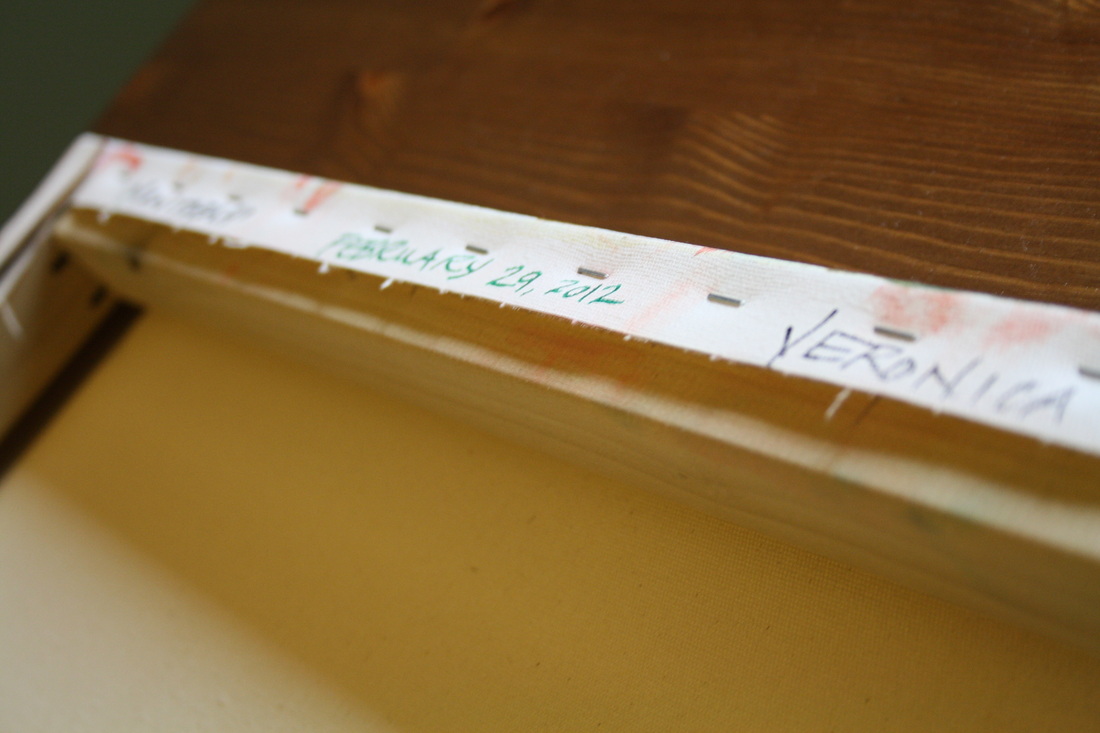 And finally, I label the top (back) of every piece with the title, date, and my name. This same method of wiring is applied even if the piece is framed, just utilizing the exterior measurements of the frame instead of the actual artwork. If there are any questions, please let me know and I will try to answer them as best I can. I hope this helps.
 Paintings by Rhea Dallaire Today I spent a lovely day with friends, great conversation and tea with Tina (always) and then helping my good friend Rhea wire canvases...I keep wanting to share the lessons I've learned on wiring work and actually meant to photograph the process but got chatting and...well, it never happened. So, tomorrow. I promise.
Last week I had such a wonderful time with my family in Manitoba, ate way too much delicious food, visited far too late into the night, and though I miss them all terribly, it really is good to be home. We encountered the gamut of seasons on our drive through the prairies...rain in Manitoba, blizzard conditions in Saskatchewan, and then, when we thought something must be wrong with our heater, summer conditions when we returned to Alberta. Spring in the Canadian prairies. Now, it's back to my own easel...that makes me so happy. 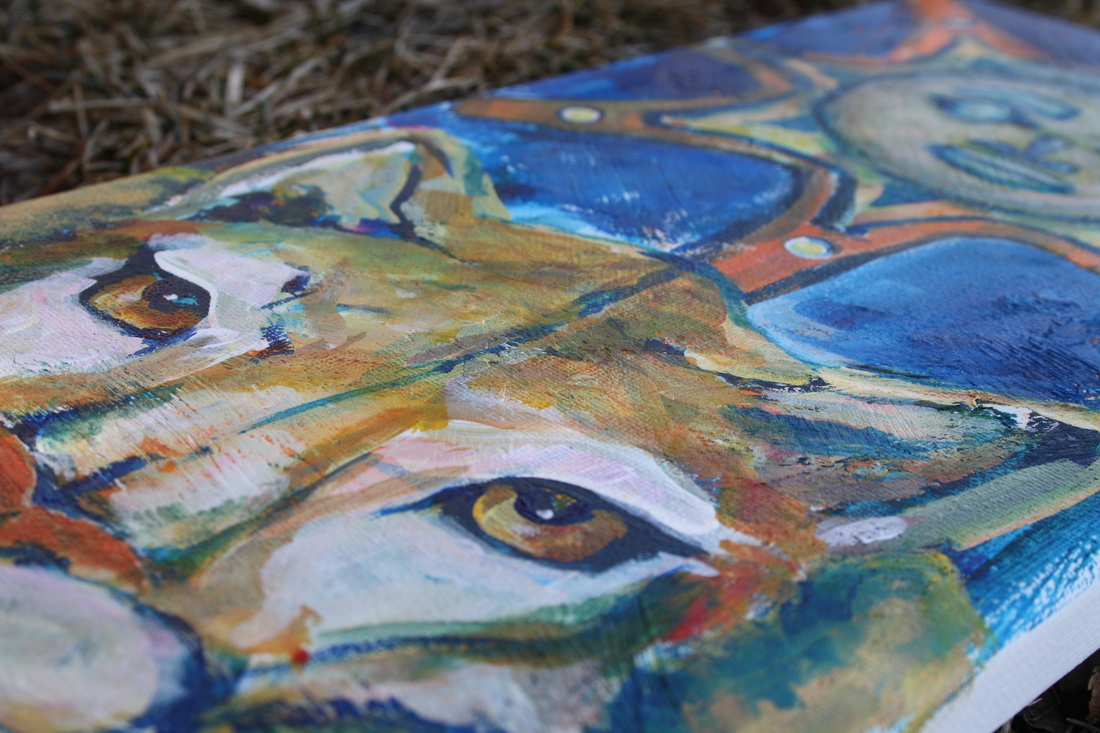  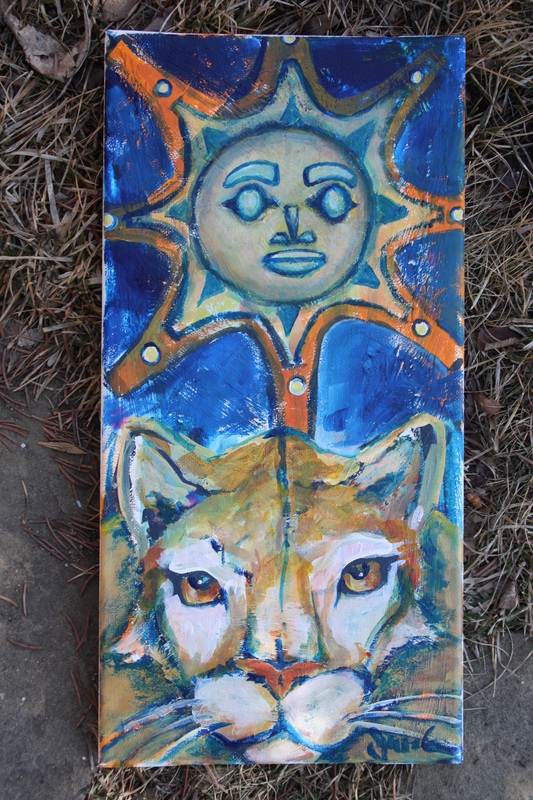 The first time I saw a totem pole I was a young girl and we had driven a few days from our northern Manitoba community through the Rocky Mountains to the east coast and I was enthralled. I remember wishing that the Haida people lived where I lived. When my children were young we spent a summer on Vancouver Island and I still can't get those beautiful images of Haida art out of my mind. Until I began painting my canoes I never thought I could honour the Haida and their art in this way.
Fortunately we don't see many cougars in the foothills but, just an hour away, my friends living in the Rocky Mountains have to watch for their young children. Even though I'm a huge cat lover, cougars do make me a little nervous. They are quiet and stealthy and always seem to be planning their next move. And they're so strong, too. They are also known in different regions as puma, mountain lion or panther. I love the fact that they absolutely trust their own instincts. As a totem animal, it symbolizes power, intention, grace and speed, and represents a balanced body, mind and spirit. All necessary in the hands of a leader.    I was born in Winnipeg, Manitoba and though I didn't grow up there, it is near and dear to my heart. I especially enjoy visiting the Winnipeg Art Gallery and then heading to Baked Expectations in Osborne Village for lunch and fabulous desert...mile high pie, cheesecake in a variety of flavours, cakes and tortes...believe me it's all good. It's been awhile but I had to try the Schmoo Torte once again - yummy angel food cake with pecans, whipped cream and caramel sauce. I meant to get a photo but when I remembered it was all gone. And the architecture is beautiful. I love walking around and stopping in at cafes, especially in the heat of the summer. Plus it's near Corydon which is also known as Little Italy...the best pizza and pasta around. Mmmmm.......
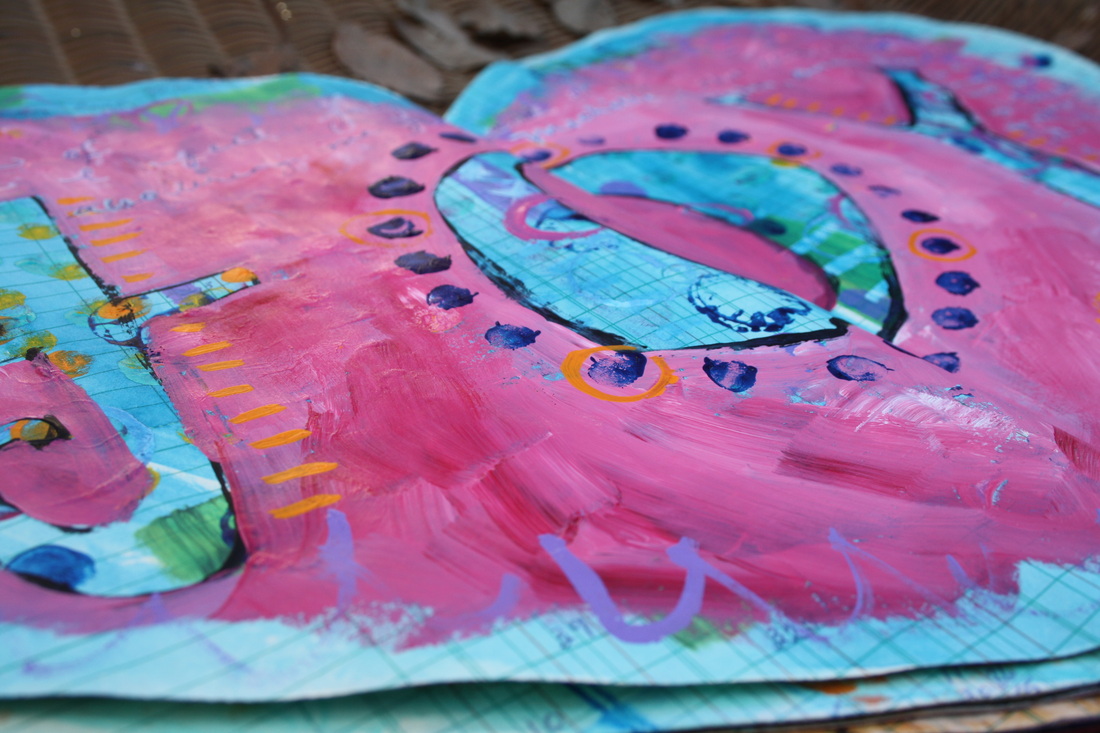
A couple of years ago a group of friends decided to alter books, each of us selecting a book to turn into art. Unfortunately I'm unsure where they have all ended up but my friend Cheryl created another and I've finally added to it, each set of pages reflecting her theme of loving yourself in the book that she cut into a heart shape. The fun of altering books is that the materials are free or very inexpensive (I found mine in the book trade hut at our recycling depot) and because there are no real 'rules' it's a great time to experiment. I have used found objects (including feathers picked up off the street), gel media, photograph transfers (using lazer printed photographs and clear mac tac), acrylic, pen & ink, stitching, and whatever else I can get my hands on. It's like art therapy. Messy but fun.
|

|